Option 1 (Contacts Within ConnectWise Automate):
You can create users so that they have access to just their machines easily through Automate if they are trying to remote into a single machine.
Prerequisites:
- Each email must be unique inside the system. They can have their email being used as a user or used at another client or location. If they do, they may be better off having a full user created.
- Each of these contacts may already be created within the systems if you have ConnectWise integration.
- Each of these machines must have the Automate Agent and ConnectWise Control Agent installed on them.
- In the Control Center go to the Client > *Name of the Client * and on the middle screen, you should see 4 tabs, Computers, Network Devices, Retired Assets, Contacts. Select Contacts.

2. Select “+ Add” and generate contact. Please the email does have to be unique if you already have the contact in there do not create a new one and skip to step 3. You only need the First and Last Name and the Email address portions filled out

3. Now go into the Client Management Screen by double-clicking on the client and going to the contacts tab and selecting your new contact.

4. Now select the Contact and on the right-hand screen, you can select the computer(s) that will be associated with them. Again, if you have a contact that needs access to multiple clients a user is better for this.

5. Now double click the contact and it’ll take you to another screen with 4 tabs one of which would be the permissions tab, from here you can select what they have access to but the main one would be Remote Access.

6. Once that’s done go into the general tab and change their web password.

7. On web go to the Web Portal and have them login using the Log In section on the right-hand side for example https://YourAutomateFQDN.com

8. Once they are in, they will need to go the left-hand side and select computers and double click the computer they want to remote into.

9. Once there they can select the Remote access button and it’ll start a ConnectWise Control session to their machine.

OPTION 2 (CREATING SESSION GROUPS IN CONNECTWISE CONTROL):
This is another option you can do especially if you have break-fix clients that you need access to. Please keep in mind the number of ConnectWise Control Access sessions is the number of Automate Agents you have so if you are near your Automate Agent limit this may not be an option.
Prerequisites:
– Must have a ConnectWise Control Access Session agent installed
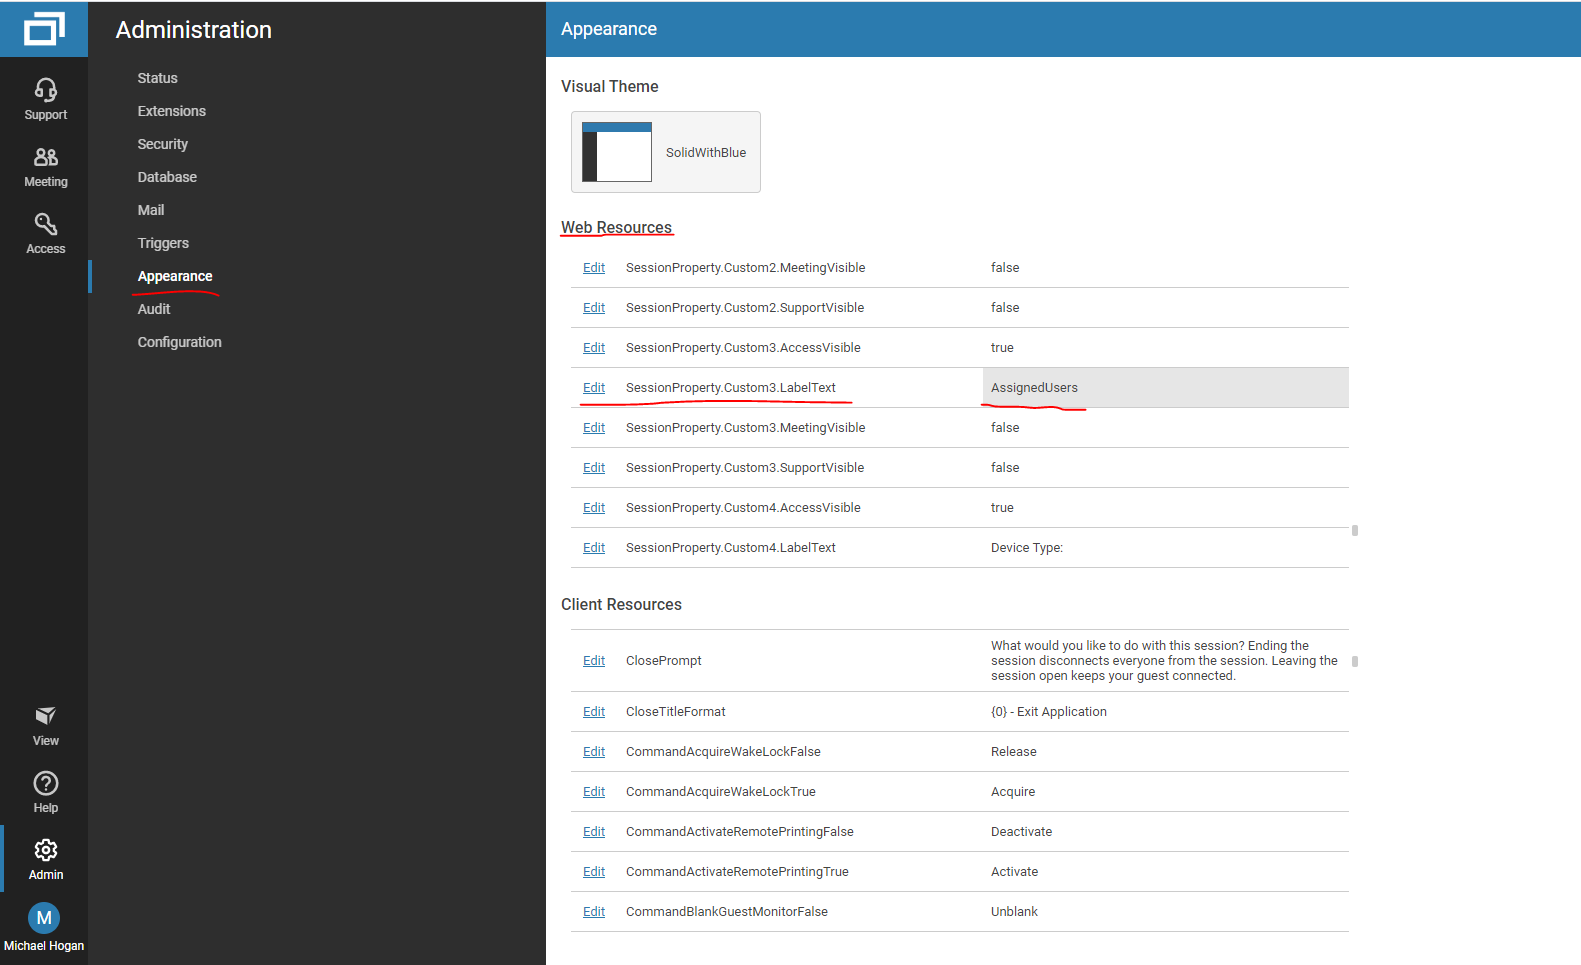
– Must Create a new custom property within your Automate Instance
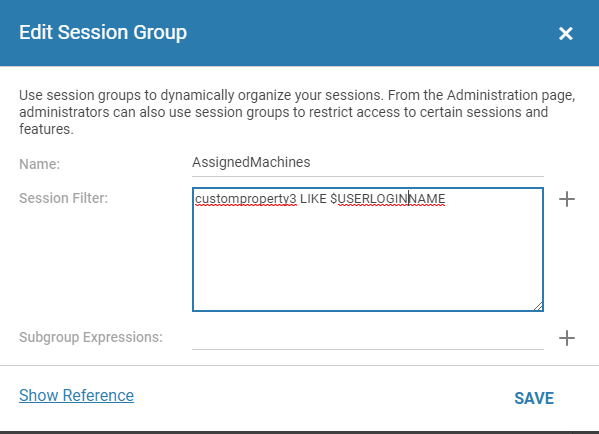
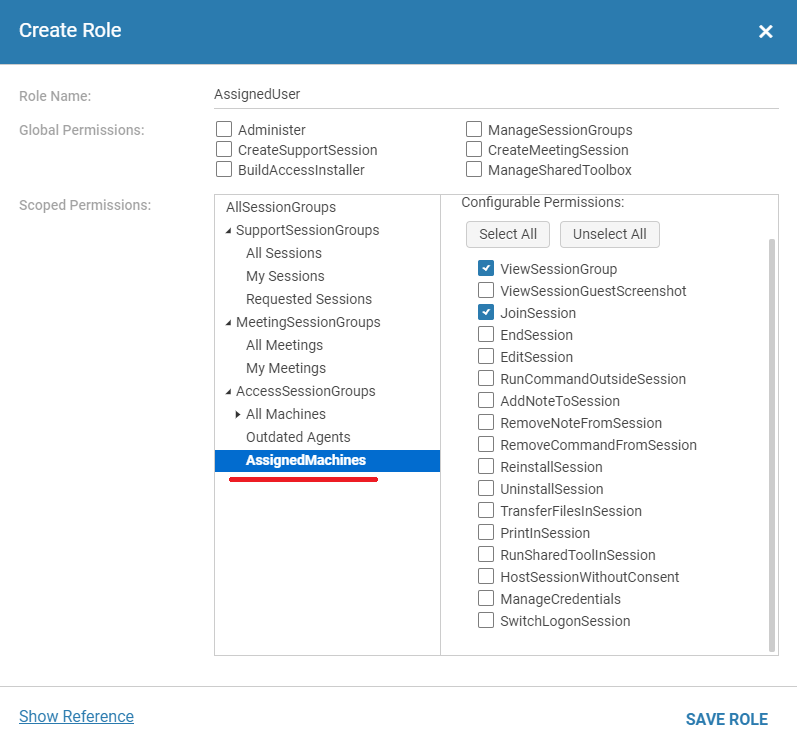
4. From here you’ll be going into the Access Section of ConnectWise Control in the bottom left corner you should “+ Create Session Group.” Click on this to create a new session group.


2FA OPTIONS:
Option 1 (Contacts): Currently there isn’t a way to add in 2FA for the contact users at this time, but they are limited in their abilities to do actions.


